[Actualizado a 30 de septiembre de 2026]
Workflow de análisis🔗
Reglas de seguridad del laboratorio🔗
- NUNCA conectes la VM de análisis a Internet real.
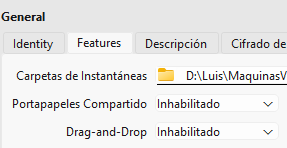
- NUNCA compartas el portapapeles entre host y VM de análisis.
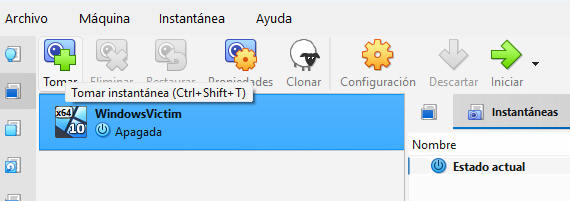
- SIEMPRE toma snapshot antes de ejecutar una muestra.
- NUNCA transfieras archivos del lab al host sin verificar.
- ACTUALIZA el host diariamente (las VMs son el sandbox, no el host).
- Al finalizar, SIEMPRE restaura al estado limpio entre análisis.
Detalle🔗
1. NUNCA conectes la VM de análisis a Internet real🔗
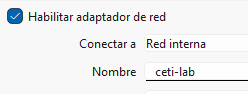
Dos opciones:
- Desconexión total
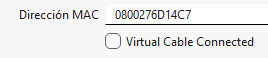
- Red interna
2. NUNCA compartas portapapeles🔗
3. SIEMPRE toma snapshot antes🔗
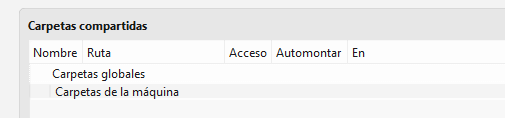
4. NUNCA transfieras archivos entre el host y la mv🔗
En Windows🔗
- Iniciar la mv
- Restaurar snapshot "FlareVM limpio"
- Iniciar REMnux + INetSim
- Transferir muestra a FlareVM (carpeta compartida temporal)
- Desconectar carpeta compartida
- Análisis estático (sin ejecutar la muestra)
- Tomar snapshot pre-ejecución
- Ejecutar muestra con monitoring activo
- Capturar tráfico en REMnux
- Documentar hallazgos
- Restaurar snapshot limpio
Preparación equipo🔗
Seguir enlace usando VAGRANT.
En AWS🔗
AMI (Windows Flare-VM)🔗
Seguir el manual AWS Malware Lab (Flare-VM + Apache Guacamole + Terraform) partiendo de Windows Server 2022 ya que 2025 falla.
Desactivar Windows Defender🔗
To disable Microsoft Defender Antivirus on Windows Server 2025 via Group Policy, you must first disable Tamper Protection. Otherwise, modern Windows versions will ignore Group Policy changes made to Defender.
-
Open Group Policy Management: 1 min. Press
Win + R, typegpmc.mscfor Domain Group Policy (orgpedit.mscfor Local Group Policy), and press Enter. -
Navigate to Microsoft Defender Policy: 1 min. Navigate through the path tree:
Computer Configuration→Administrative Templates→Windows Components→Microsoft Defender Antivirus. -
Enable 'Turn off Microsoft Defender Antivirus': 2 min. Double-click Turn off Microsoft Defender Antivirus, select Enabled, and click OK.
(Note: Setting this policy to "Enabled" turns the feature OFF).
-
Disable Real-Time Protection (Recommended): 2 min. Navigate to the sub-folder Real-time Protection. Double-click Turn off real-time protection, select Enabled, and click OK.
-
Apply Policy Update: 1 min. Open PowerShell or Command Prompt as Administrator and run
gpupdate /forceto apply the policy immediately.
To verify if the policy applied successfully, run Get-MpComputerStatus | Select-Object RealTimeProtectionEnabled in PowerShell. The result should show False.
Alternative for Windows Server🔗
If you are installing a third-party antivirus, Windows Server supports completely removing the Defender feature. You can run the following PowerShell command as Administrator and reboot:
Uninstall-WindowsFeature -Name Windows-Defender
Crear shadow copies🔗
En Windows Server, el concepto de "Punto de restauración" (System Restore) que existe en Windows 10/11 no viene integrado. En su lugar, el sistema utiliza Instantáneas de volumen (Shadow Copies / VSS) o las Copias de seguridad de Windows Server (Windows Server Backup).
Opción 1: Crear una Instantánea de Volumen (VSS) por GUI🔗
Para crear una instantánea rápida de un volumen (por ejemplo, C:):
-
Abrir Administración de discos: Presiona
Win + R, escribediskmgmt.mscy pulsa Enter. -
Acceder a Instantáneas: Haz clic derecho sobre el volumen (por ejemplo,
C:) y selecciona Configurar Instantáneas... (Configure Shadow Copies). -
Habilitar y Crear Instantánea: Selecciona el volumen deseado en la lista, pulsa en Habilitar (si no está activo) y haz clic en el botón Crear ahora.
Para comprobar que se creó correctamente, revisa en la lista de "Instantáneas de este volumen" que aparezca la fecha y hora actual.
Opción 2: Crear la Instantánea desde PowerShell (Más rápido)🔗
Puedes ejecutar el siguiente comando en PowerShell como Administrador para generar la instantánea directamente:
(Get-WmiObject -List Win32_ShadowCopy).Create("C:\", "ClientAccessible")
Para verificar que la instantánea existe, ejecuta:
vssadmin list shadows
El resultado mostrará un listado con el ID y la fecha de la instantánea generada.
Opción 3: Estado del Sistema (System State Backup)🔗
Si lo que buscas es respaldar los archivos críticos del sistema, el Active Directory (si aplica) y el registro antes de hacer cambios profundos:
- Instala la característica ejecutando en PowerShell:
Install-WindowsFeature -Name Windows-Server-Backup -IncludeManagementTools
- Crea una copia del estado del sistema guardándola en otro volumen (por ejemplo,
D:):
wbadmin start systemstatebackup -backupTarget:D: -quiet
REMnux + Flare-VM🔗
- Automatizado con Terraform ➡️ AWS Malware Lab (REMnux + FLARE-VM)